How to build a concrete block swimming pool, step-by-step for Kent homes. Building your own concrete block swimming pool is an ambitious but rewarding project that many Kent homeowners are considering. With the right planning and execution, you can create a stunning backyard oasis that adds value to your property. Here’s everything you need to know about tackling this substantial DIY project.
Planning Your Pool Design
Before you break ground, spend time designing a pool that suits both your space and local conditions. Kent’s varied terrain means each site presents unique challenges, so consider your garden’s slope, drainage, and proximity to existing structures.
For properties with challenging conditions like soft ground or areas prone to settling, curved or oval designs offer superior structural integrity compared to rectangular pools. The curved walls distribute pressure more evenly, reducing the risk of cracks over time.
Think about practical elements too: where will the pump equipment go? How will you access the pool for maintenance? These decisions made early will save headaches later. If you’re planning a new home in Tenterden Kent, incorporating pool planning into your overall site design creates better integration.
Site Preparation and Excavation
Start by marking your pool’s outline with spray paint, adding an extra foot on all sides for working space. Before any digging begins, contact utility companies to mark underground lines – hitting a gas or electrical line can be dangerous and expensive.
Excavation needs precision. Dig 6 inches deeper than your planned pool depth to accommodate the concrete floor thickness. Keep soil away from the dig site, as you’ll need clean backfill material later. The excavated area should have smooth, stable sides to support your block walls.
Create a level footing around the pool’s perimeter. This shallow foundation – typically 12 inches wide and 6 inches deep – provides a stable base for your first course of blocks. While this becomes less critical once the pool fills with water, it’s essential during construction.
Choosing the Right Concrete Blocks
Not all blocks work for pool construction. You’ll need four main types for a proper installation:
- Cleanout blocks (20.45) for the bottom course to prevent mortar joints running through the wall
- “H” blocks (20.48) for the main wall body, laid in running bond with open ends for easy concrete pouring
- Corner bond beam blocks (20.21) for structural corners
- Coping blocks (20.61) for the pool edge finishing
Standard blocks don’t allow proper steel reinforcement spacing, so lintel blocks with notches work best. These enable correct rebar placement every 8 inches both vertically and horizontally – crucial for preventing cracks and leaks.
Installing Steel Reinforcement
Proper reinforcement separates amateur from professional results. Steel rebar should run continuously through floors and walls, with horizontal bars placed every 8 inches in both directions.
Start by setting one row of blocks in mortar below your planned floor level. Then glue a row of lintel blocks using construction adhesive at floor thickness height (typically 6 inches). Thread bent rebar through every core, ensuring at least 12 inches overlap with floor reinforcement. Secure all connections with wire ties.
Stack subsequent block courses with aligned cores, maintaining proper rebar overlaps throughout. This creates a continuous steel skeleton that gives your pool long-term structural integrity.
Plumbing and Electrical Installation
With your block walls partially complete, install all plumbing before concrete pouring. Map out your circulation system carefully – returns, skimmers, main drains, and any special features like waterfalls or spa jets.
Drill precise holes in blocks for PVC pipes, using expansive cement rather than regular cement for connections. Regular cement shrinks as it cures, potentially creating leak paths, while expansive cement maintains a tight seal.
Position your main drain at the pool’s lowest point to ensure complete water drainage. Install return fittings according to your circulation design, typically one return for every 15 feet of pool perimeter.
Electrical work requires particular attention to safety codes. All pool electrical systems need proper bonding, and GFCI protection is mandatory. Unless you’re a qualified electrician, this is where professional builders in Hastings or electrical contractors become invaluable.
Applying Surface Bonding Cement
Before concrete pouring, apply surface bonding cement to both interior and exterior block surfaces. This specialized product contains latex glue and glass fibers, creating stronger bonds than traditional mortar while providing waterproofing properties.
Apply at least 1/16 inch thickness using a trowel or sprayer. Work in manageable sections, ensuring complete coverage without gaps. This first coat protects blocks during concrete pouring and provides the foundation for your waterproof system.
You’ll apply a second coat after concrete work completes, creating a dual-layer waterproof barrier that’s essential for long-term pool integrity.
Pouring Concrete Floors and Walls
This step requires careful coordination and ideally, professional concrete services. Floor and wall concrete should be poured in one continuous operation to ensure proper structural integration.
Use concrete with 125-150mm slump for walls, filling immediately after floor placement. Rod the concrete in walls to eliminate air pockets, but avoid vibrating wall concrete as this can cause segregation.
Maintain approximately 6-inch thickness throughout – both walls and floors. Screen the floor smooth and form curved transitions where walls meet floors. These curves eliminate stress concentration points that cause cracks.
The concrete pour is physically demanding and time-sensitive. Many homeowners find that working with experienced construction companies in Kent UK for this stage ensures professional results while managing the logistics of concrete delivery and placement.
Curing and Initial Waterproofing
Proper curing takes 28 days – there are no shortcuts. During this period, spray pool surfaces with water 2-3 times daily to ensure complete concrete hydration. This step directly affects your pool’s long-term durability and waterproofing.
After curing completes, apply waterproof sealant over all interior surfaces. Roll or spray the sealant evenly, paying special attention to wall-floor transitions and any penetrations for plumbing fittings.
This waterproofing layer works with your surface bonding cement to create a comprehensive moisture barrier. Skip this step, and you’ll likely face leak repairs later.
Finishing Touches and Tiling
With waterproofing complete, install waterline tile along the top 6 inches of your pool. This serves both aesthetic and practical purposes – preventing staining at the waterline while giving you design flexibility.
Choose tiles rated for pool use and freeze-thaw resistance – important in Kent’s climate. Professional tile installation ensures proper adhesion and grout sealing, preventing water infiltration behind tiles.
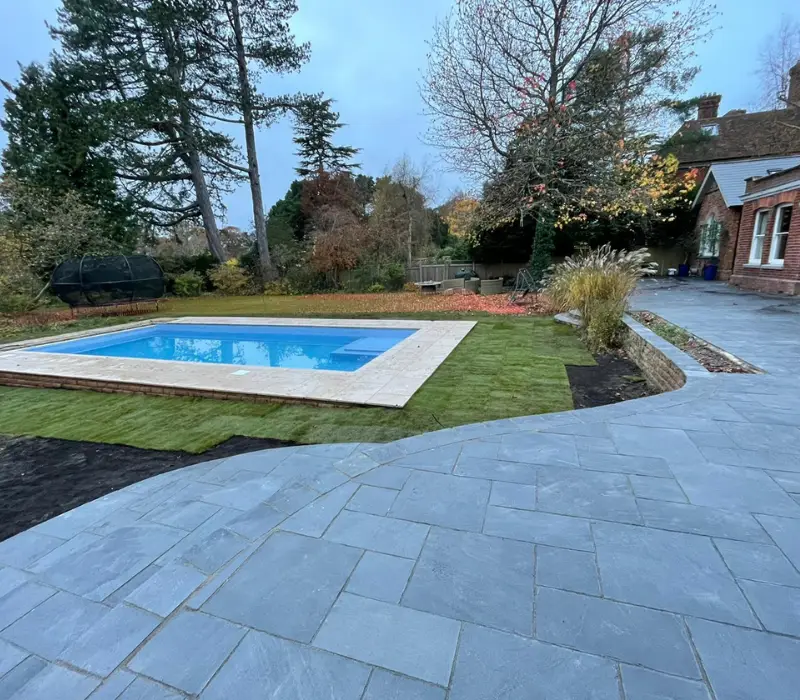
Consider your overall landscape integration too. Your pool should complement your garden design, perhaps connecting to broader landscaping plans for a cohesive outdoor space.

When to Call Professionals
While concrete block pool construction is achievable for dedicated DIYers, certain stages benefit from professional expertise. Electrical work, complex plumbing, concrete pours, and final finishing often justify professional involvement.
If you’re planning this as part of broader property improvements, consider how pool construction integrates with other projects. Professional contractors can coordinate multiple trades efficiently, potentially saving time and money overall.
For major groundworks or if your site presents challenges like poor drainage or unstable soil, professional consultation early in planning prevents costly problems later.
Your concrete block swimming pool represents a significant investment in your property and family enjoyment. Taking time to plan properly, using quality materials, and recognizing when professional help adds value ensures results that will provide years of satisfaction.
Whether you tackle the entire project yourself or work with experienced professionals for key stages, the reward of swimming in your own backyard pool makes the effort worthwhile. For more information and to learn more please view our dedicated Swimming Pool Services Page.